24. Curl
Section titled “24. Curl”This method is to create http requests from curl command. If you want to know more about curl, please click the Curl document.
24.1 How to enter (a) command(s)
Section titled “24.1 How to enter (a) command(s)”Create a Test Plan From a cURL Command
- To create an import from a cURL, open the
Toolsmenu and clickImport from cURL.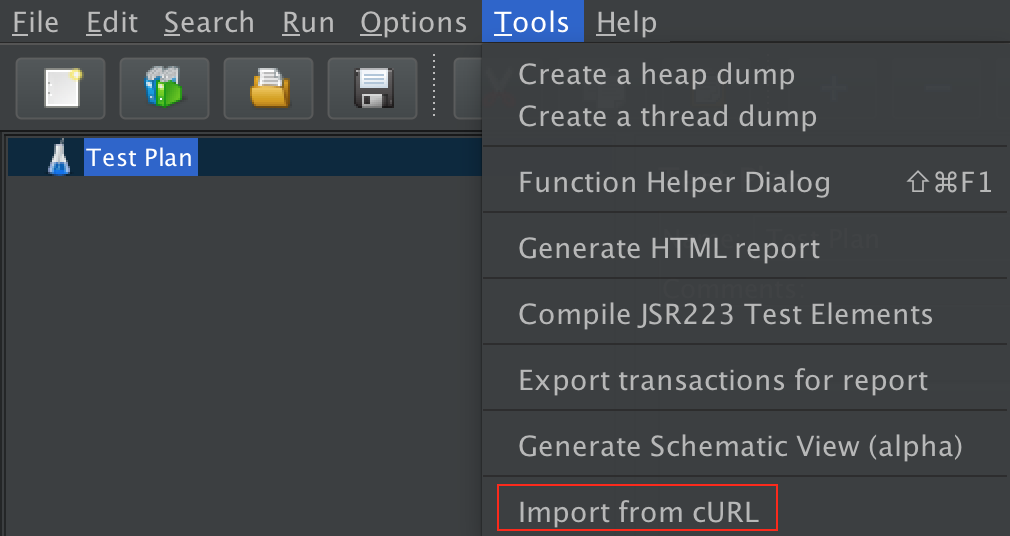 Figure 1 - The menu where curl is located
 - There are two ways to enter the curl command line. Firstly, we can enter it manually. Secondly, we can import a file containing the curl command line. This tool supports input of multiple curl command lines at the same time.
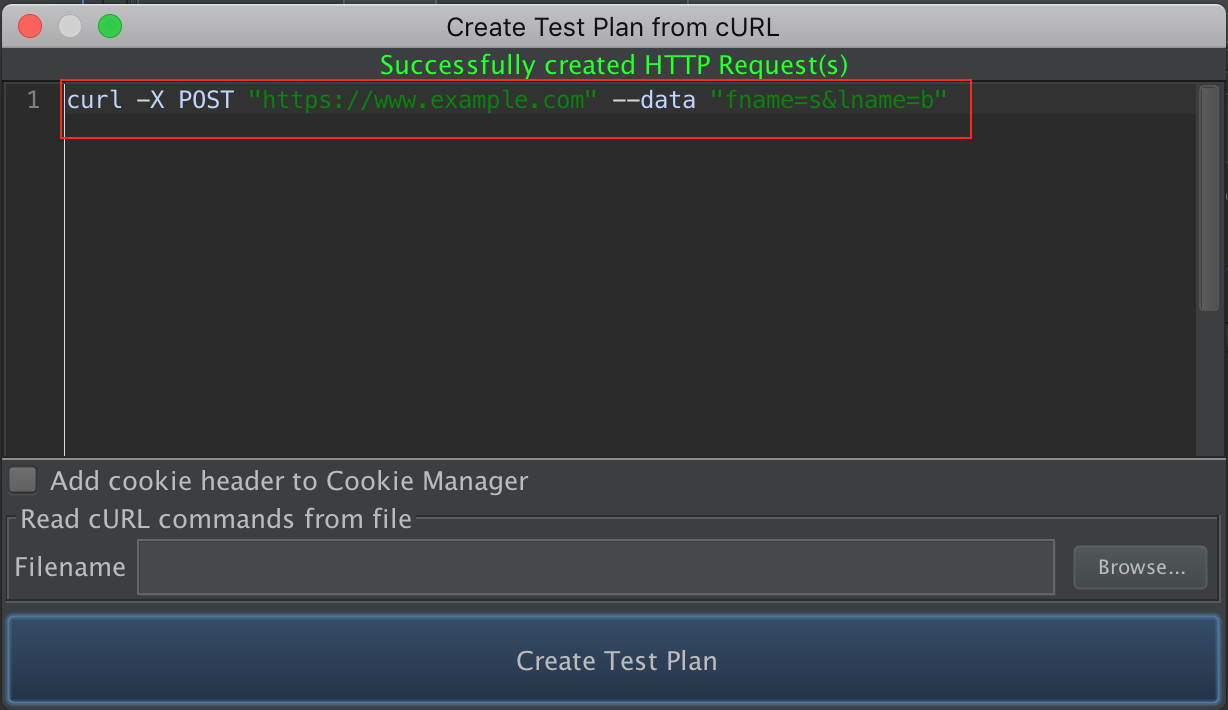 Figure 2.1 - Enter curl command in text panel
 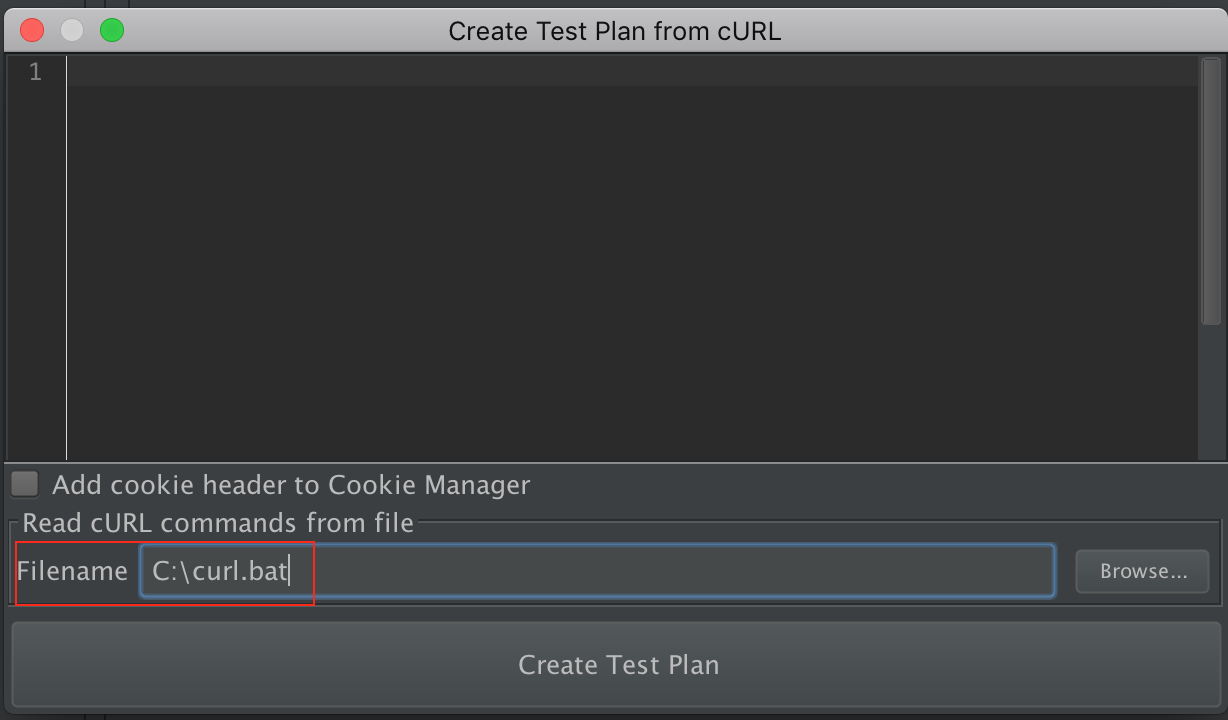 Figure 2.2 - Enter curl command from file
 - Then, click
Create Test Planbutton and a new HTTP Sample will be added to the Test Plan.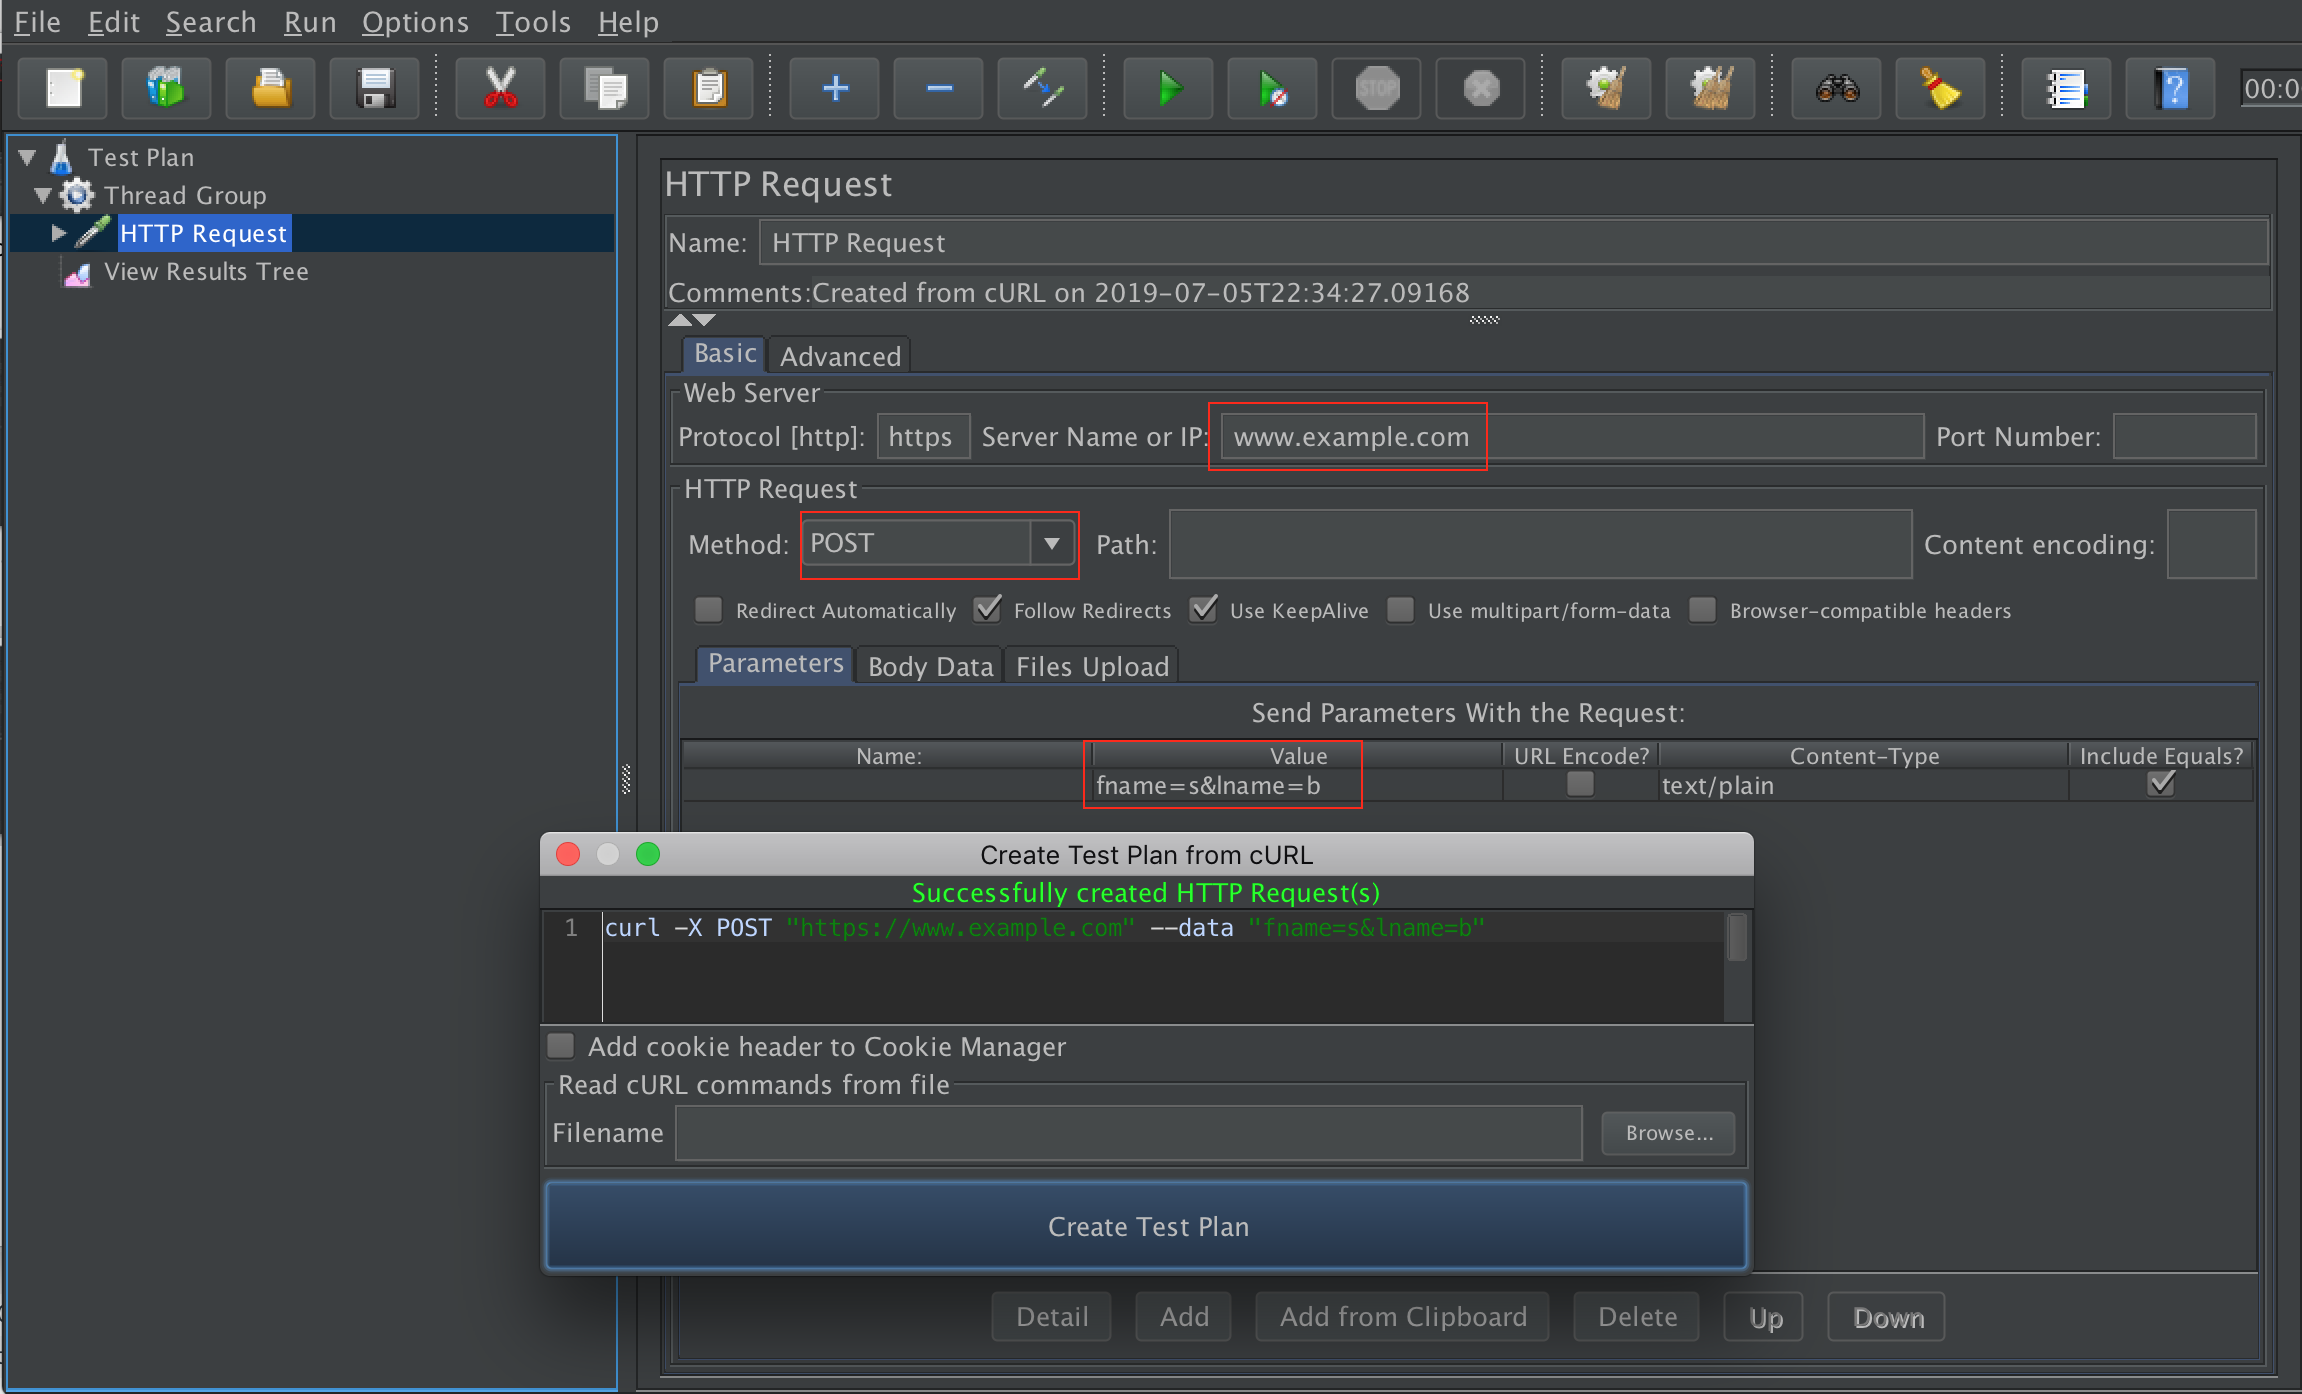 Figure 3 - result of Test Plan
24.2 Curl options supported
Section titled “24.2 Curl options supported”-H, --header <header>
: Extra header to use when getting a web page.
-X, --request <command>
: Specifies a custom request method to use when communicating with the HTTP server.
--compressed
: Request a compressed response using one of the algorithms curl supports, and return the uncompressed document.
-A, --user-agent <agent string>
: Specify the User-Agent string to send to the HTTP server.
-b, --cookie <name=data>
: Pass the data to the HTTP server as a cookie.
-d and friends
: Sending data via POST request
Sends the specified data in a POST request to the HTTP server. If this option is used more than
once on the same command line, the data pieces specified will be merged together with a
separating ‘&’ character. Thus, using ‘-d name=daniel -d skill=lousy’ would generate a POST
chunk that looks like ‘name=daniel&skill=lousy’.
-d, --data <data>, --data-ascii <data>
: use @ to upload a file
--data-raw <data>gt;
:
--data-raw <data>
: This posts data exactly as specified with no extra processing whatsoever.
If you start the data with the character @, the rest should be a filename.
--data-raw <data>ta>
: This posts data, similar to the other --data options with the exception that this performs
URL-encoding.
--data-raw <data>
: This posts data similarly to --data but without the special interpretation
of the @ character.
-F and friends
: This lets curl emulate a filled-in form in which a user has pressed the submit button.
-F, --form <name=content>
: use @ to upload a file
--form-string <name=content>
:
-u, –user <user:password >
: Specify user and password to use for server authentication.
--basic, --digest
: Tells curl to use HTTP authentication.
--cacert and friends
: Tells curl to use the specified client certificate file when getting a file with HTTPS
--cacert <CA certificate>
--capath <CA certificate directory>
--ciphers <list of ciphers>
--cert-status
--cert-type <type>
-G, --get
: put the post data in the URL and use get to replace post.
--no-keepalive
: Disables the use of keepalive messages on the TCP connection.
-e, --referer <URL>
: Sends the Referer Page information to the HTTP server.
-L, --location
: If the server reports that the requested page has moved to a different location
this option will make curl redo the request on the new place.
-i, --include
: Include the HTTP-header in the output.
--connect-timeout <seconds>
: Maximum time in seconds that the connection to the server may take.
--keepalive-time <seconds>
: This option sets the time a connection needs to remain idle before sending keepalive probes
and the time between individual keepalive probes.
-m, --max-time <seconds>
: Maximum time in seconds that you allow the whole operation to take.
-x, --proxy <[protocol://][user:password@]proxyhost[:port]>
: Use the specified HTTP proxy. If the port number is not specified,
it is assumed at port 1080.
-U, --proxy-user <user:password>
: Specify user and password to use for proxy authentication.
-k, --insecure
: This option explicitly allows curl to perform insecure SSL connections and transfers.
--raw
: When used, it disables all internal HTTP decoding of content or transfer encodings and instead makes them passed on unaltered,raw.
-I, --head
: Fetch the HTTP-header only. HTTP-servers feature the method HEAD which this uses to get nothing but the header of a document.
--interface <name>
: Perform an operation using a specified interface. You can enter interface name, IP address or host name.
--proxy-ntlm/--proxy-negotiate
: Tells curl to use HTTP BASIC/NTLM/Digest authentication when communicating with the given proxy.
--dns-servers <addresses>
: Resolve host name over DOH.
--resolve <host:port:address>
: Provide a custom address for a specific host and port pair.
--limit-rate <speed>
: Specify the maximum transfer rate you want curl to use.
--max-redirs <num>
: Set maximum number of redirections which may be followed.
--noproxy <no-proxy-list>
: Comma-separated list of hosts which do not use a proxy, if one is specified.
24.3 Warning
Section titled “24.3 Warning”When the command you entered is ignored or contains warning content, we will display warning in the comment section of HTTP Request.
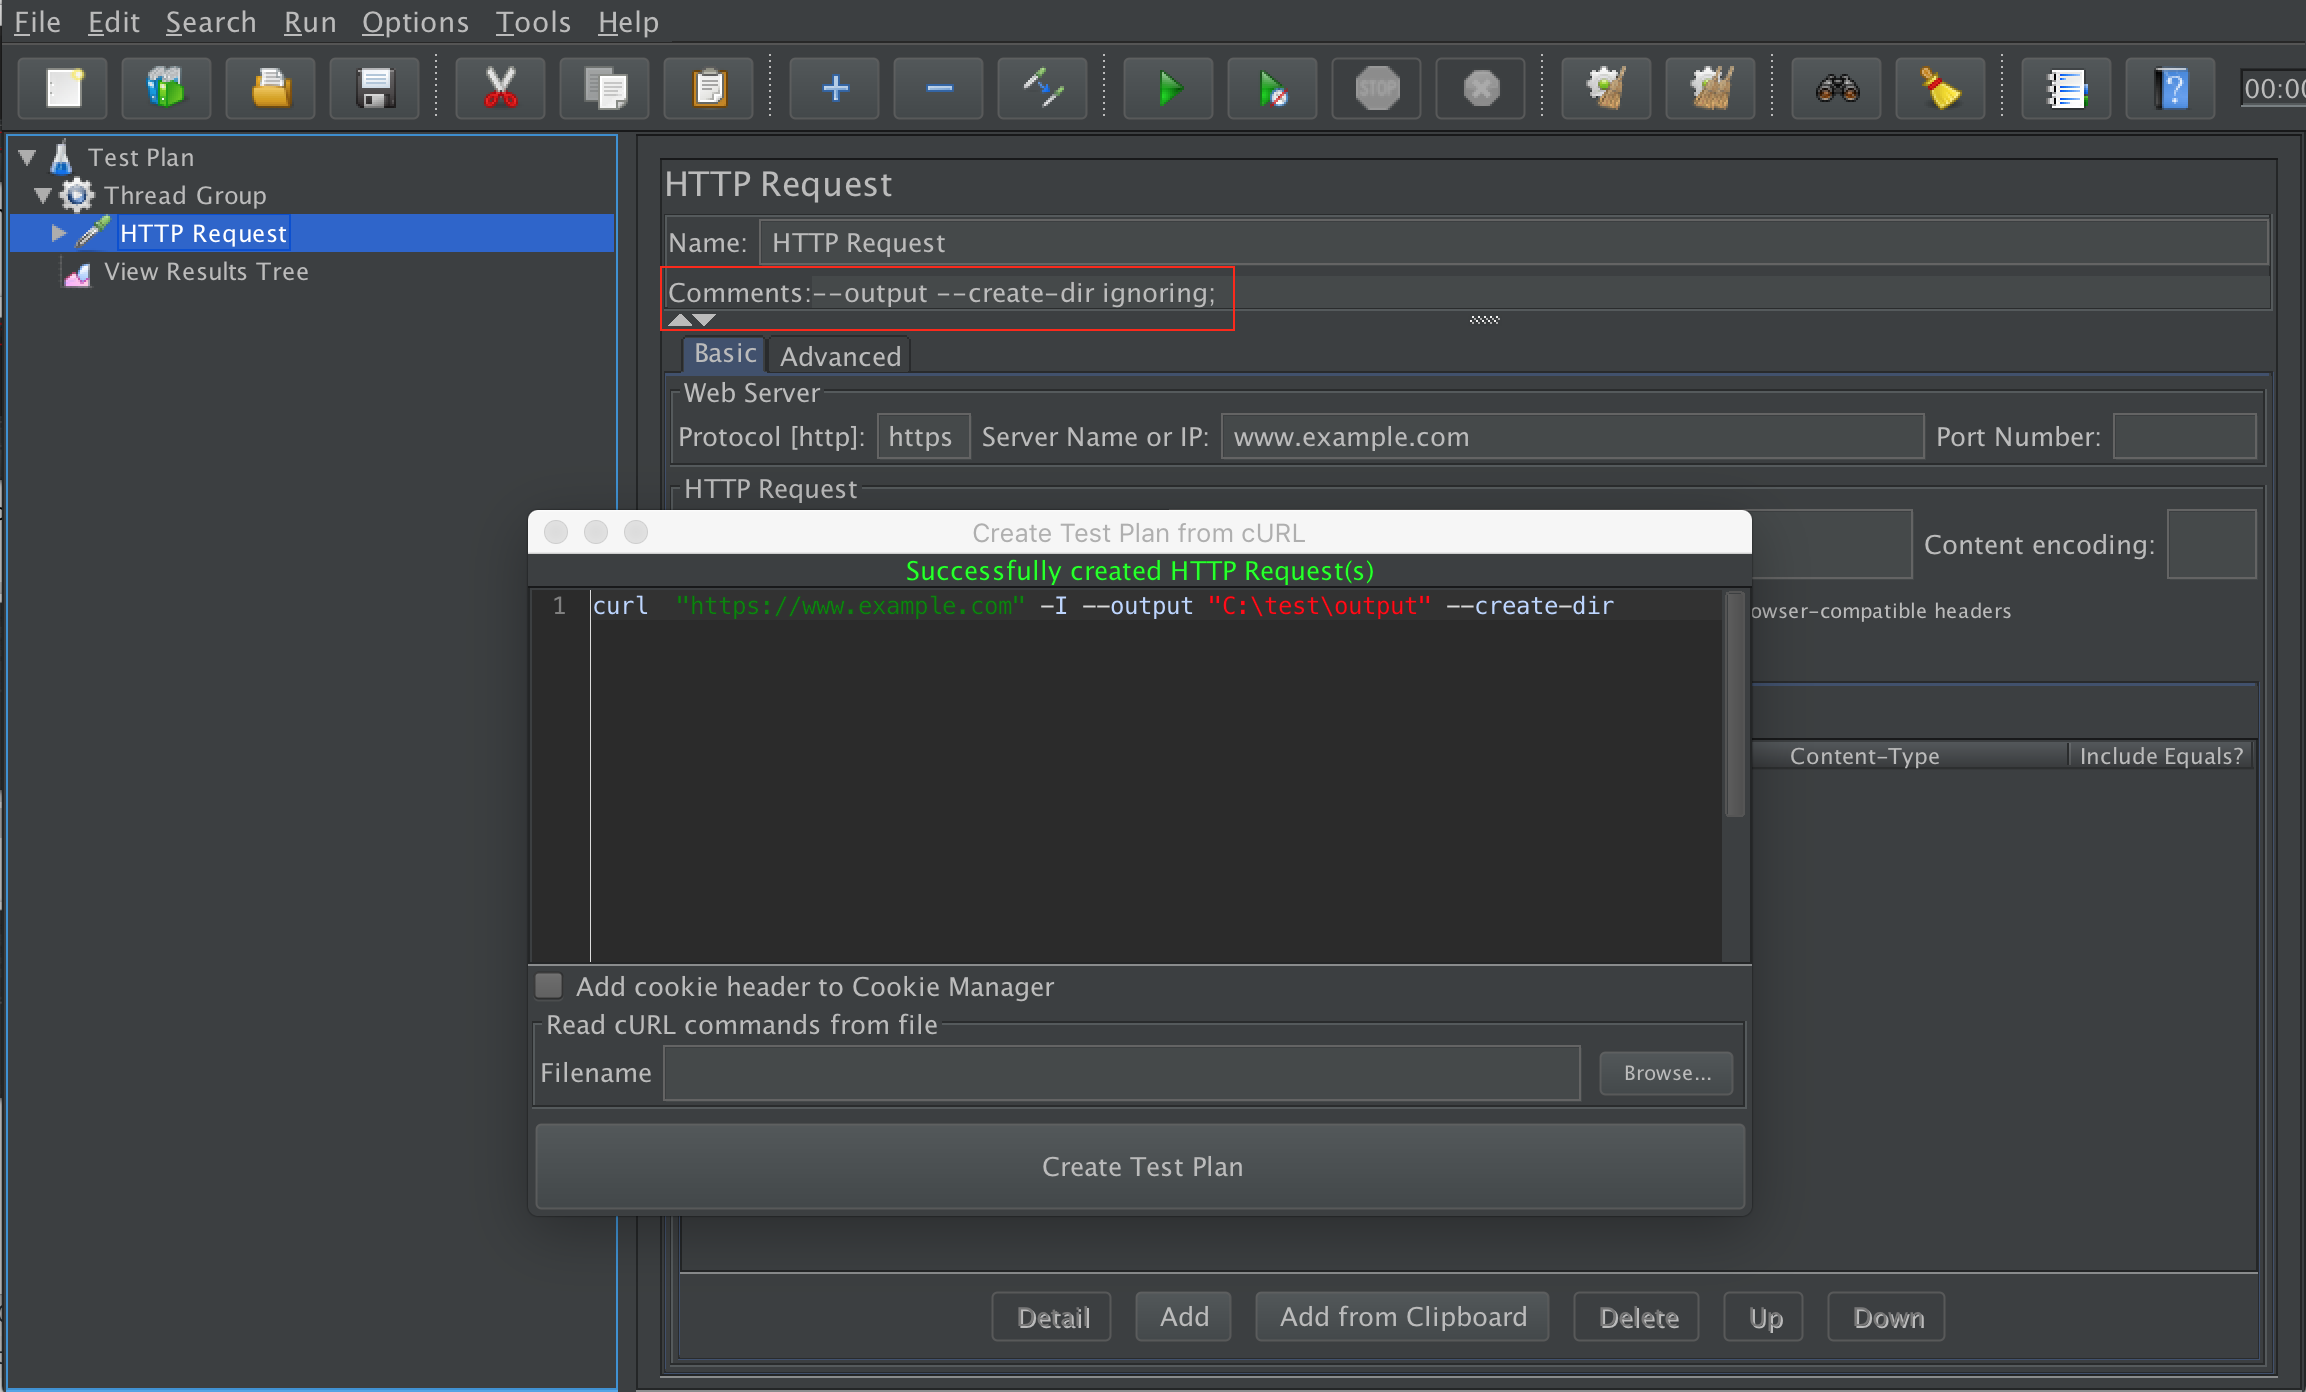 Figure 1 -Warning
24.4 Examples
Section titled “24.4 Examples”Use cookie
curl -X POST "https://example.invalid" -b 'username=Tom;password=123456'Use data
curl -X POST "https://example.invalid" --data 'fname=a&lname=b'Use form
curl -X POST "https://example.invalid" -F 'lname=a' -F 'fname=b' -F 'c=@C:\Test\test.txt'Use proxy
curl 'https://example.invalid/' -x 'https://aa:bb@proxy.invalid:8042'Use authorization
curl "https://example.invalid" -u 'user:passwd' --basicUse DNS
curl "https://example.invalid" --dns-servers '0.0.0.0,1.1.1.1'